Showing posts with label Reviews. Show all posts

Monday, August 22, 2016

Inateck USB3.0 to IDE + SATA converter: Read your old drives on recent devices!

A few friends of mine needed data recovery from old broken computers they had. Most of them had a tower form factor PC with old IDE drives or more recent ones with SATA port.
For those no issue: Having old working PCs around ... Only needed to drop the HDD in the PC and voilà.
But recently, two friends had Laptops IDE HDDs and i had no way to save their data!


Inateck USB3.0 to IDE + SATA converter
A kind of a Savior

To be able to read these old laptop IDE HDDs i needed something new. Here is what i needed: The ability to
  • access SATA drives (to use 3.5" HDD on a laptop)
  • access old 3.5" IDE drives
  • access old 2.5" IDE drives (what I specifically needed this time)
  • an external PSU, that's not the poor 5V 500mA that will power a 3.5" IDEdrive
  • a power switch button to be able to "hot swap" the converter and "cold swap" the drives


After some search I came across the Inateck USB3.0 to IDE + SATA converter [I am not affiliated in any way with Amazon or Inateck, this is just a personal experience.]


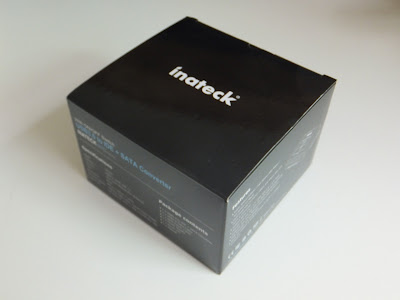
Unboxing
What's inside the box (for real?)

Advertised content is contractual with the description of the product:
There is:
  • The converter itself (model UA2001)
  • USB3.0 cable
  • Molex power cable
  • Power Supply (12V, 2A rated, with a 20AWGX2C; isn't 20AWG rated for 1.5A max?)
  • Driver CD, useless on linux
  • Instructions manual, explaining how to use the backup software
Converter sepcs:
  • SATA port
  • 44 pins laptop IDE port
  • 40 pins 3.5" IDE port
  • On the back side:
  • On/Off switch
  • 12V 2A input port
  • USB3.0 port
  • 12V+5V output port (for the MOLEX adapter)
  • On the top:
  • Backup button
  • power LED


Notes: The converter is made of quite thick and solid black plastic (1mm thick on the edges), it is not "pretty" but it looks tough and reliable (ok, the last thing that i thought was tough -a Nitecore flashlight- failed me).
The molex adapter is made of small gauge wires (20AWG) so it shouldn't be able to power a Sony Optiarc AD-5260S (5V/1.5A,12V/2.5A!)


Does it actually work?
Yes it does its job

Due to wide compatibility, either the drive or the converter is hanging and not lying on the table. This is not for daily usage in a crowded place but more as an occasional help.
It even works with more than one devices plugged: the datasheet says "Operates with one IDE and one SATA HDD Simultaneously"

Actually lsblk recognises correctly 3 disks when the 2 IDE ports are populated and the SATA too (all with HDDs contrary to the picture above). (though i didn't tried to read/write massive amount of data simultaneously)
sda: internal HDD
sdb: SATA HDD
sdc: 2.5" IDE HDD
sdd: 3.5" IDE HD


So it works on Linux computers, but can we use it as USB OTG reader for an Android device?


OTG mode
What about android?
Let's say you don't have a PC (as if it died, but the HDD and your data are still safe but unreachable).
This adapter works flawlessly in OTG mode using a simple OTG cable used to read USB flash-drives on Android devices.
There's nothing to fear about, the power supply of the HDD is done by the adapter PSU so the Android device won't drain itself trying to power it.


Conclusion
Global feelings

The overall quality of the product is quite good considering the price.
I think it is a great product for the usage i have i.e. data recovery once in a while. But it is definitely not for professional or intense usage like 7hrs/day&5days/week. (less compatible and more specific devices would do the job better, like one for SATA, one for 40pins IDE and one for 44pins IDE)
It has great compatibility both with devices and hosts: it could read anything i tried (SATA/IDE HDDs, IDE and SATA CD/DVD drives) on any platform (Windows, Linux and Android [sadly CD/DVDs couldn't be read on my smartphone])

Saturday, January 9, 2016

Quickie #6: Nitecore MT06 and Thermal Throttling

I recently bought a Nitecore MT06 at my local retailer (i went in to get a Nitecore Tube, but bought both the Tube, and the MT06. The Nitecore MT06 is a great pen sized flashlight featuring a 165lm max light output.. but for how long before the thermal throttling feature starts?


The specs
the official ones


Benchmarking
The tools

To get an idea of the flashlight performance i needed a way to measure the Luminous intensity (cd). Having no professional tool for that i used the CT406 light sensor that is embedded in the Moto G first gen (XT1032) : the results won't be complying with the ANSI/NEMA FL1 standard but will be good enough to get our own idea of the flashlight performance.

Tools and Methods:
  • Power source: 2*AAA Energizer Rechargeable NH12 (Brand New)
  • Light sensor: CT406, giving results in illuminance in Lux(lx) turned into Luminous intensity via this formula:
    Iv(cd) = Ev(lx) × (d(m))^2
  • Calculated light output in Lumens (lm) :
    lm = cd × ( 2π(1 - cos(apex angle in °/2)) )
  • Calculated throw (beam distance in meters) :
    throw (lm) = sqrt(candela/0.25)
How to get the experimental light outpout?
As written above, the formula is the following : lm = cd × ( 2π(1 - cos(apex angle in °/2)) )
The measured apex angle is roughly 18° (result that we also can get using the advertised light output and the peak beam intensity [165lm, 2120cd ==> 18°])


EDIT: How to get the Surface temperature?
A simple crappy medical contact less thermometer (the Powerscan TH23F -that i recently got for 3€, and does not worth much more-) allows to measure the surface temperature of the flashlight body (with a maximum inaccuracy of about 1°C) , this does not give the real chip temp, but gives some interesting clues.

The experiment was carried out during 40 minutes. In three phases :
  1. MT06 set to high, as long as it can (meaning until it was too hot to even touch and hold... the ON/OFF switch!
  2. After a two minutes cool down (from really hot to warm), another period on high mode. untill it reaches the same heat trigger : human pain...
  3. Sixteen minutes in low mode to see how consistent the light output is when regulated.


EDIT: A second experiment is now added : full run from max to 1lm, to show both thermal throttling and runtime


Results...

Measured vs Advertised specs (high mode):
The FL1 standard asks to wait for 30 to 120 seconds before measuring the peak beam intensity
The first result (max) is obtained right after turning ON the flashlight, the second (FL1) complies with the FL1 standard and is compared to the official specs.
AdvertisedMeasured
Peak Beam Intensity (max)2238 cd
Peak Beam Intensity (FL1)2120 cd2114-2135 cd
Light Output (max)173 lm
Light Output (FL1)165 lm163-164 lm
Beam Distance (max)94 m
Beam Distance (FL1)92 m92 m
Considering the inaccuracy of the angle measure and the use of a CT406 as light sensor, it seems that Nitecore claims are absolutely legit.

Measured vs Advertised specs (low mode):
AdvertisedMeasured
Peak Beam Intensity (FL1)422 cd
Light Output (FL1)32 lm32.5 lm
Beam Distance (FL1)41 m


... and Thermal Throttling

Here is what Nitecore says on the MT06 user manual : "NOTE: The MT06 will begin adjusting output lumens automatically after 5 minutes of use, thus preventing overheating and extending battery life"
Let's see how much this is true and how long we can get the advertised 165lm!

Having nothing to measure the own flashlight temperature, an apparent temperature has been used instead (human felt temperature in a subjective range : room temp, warm, hot, and too hot)


  • Phase One:
    • for 5 minutes is at about 165lm (as advertised) but heat is increasing quickly until no one would like to hold the flashlight any more... (green circle)
    • Then, Thermal throttling start and the driver limits the led to 145lm which is still acceptable, though temperature decrease, the flashlight is still to hot to be comfortable to hold for a long time! (red circle)
    • Nitecore advertises 165lm, 45 minutes of life time with two 1.2V 750mAh batteries, this mean that roughly 1A of current is flooding through the flashlight. Considering that a LED turns about 20% of energy to light, it means that 80% is turned into heat... so here the flashlight needs to dissipate about 2W of pure heat with its small aluminum boddy.
  • Short period of cool down (from minute 10 to 12)
  • Phase Two: This time the flashlight starts throttling less than one minutes after lighting up (not cooled enough during the 2 minutes stop period)
  • Longer period of cool down : about 4 minutes
  • Phase Three : Low mode, not much to say about it... It works without thermal throttling -hey, the heat to dissipate is only about 0.25W!-


EDIT: I made another benchmark with Surface temperature measurements:
This time, i made a full run from full batteries -at max output (aka 165lm mode)- until getting as low as 1lm of output (after 41 minutes of runtime)


Here we can see 4 phases
  1. Phase 0, the flashlight is turned ON and gives maximum output until thermal throttling strikes (when reaching a surface temp of about 50°C)
  2. Phase 1, thermal throttling shows up, and reduces the max output to limit heat dissipation, light output is really stable, but temperature rises slowly until reaching about 58°C
  3. Phase 2, thermal throttling gets a little more aggressive, lowering output to stop heat from rising more than 58°C, temperature is maintained this way for about 2 more minutes
  4. Phase 3, End of game: Batteries are dying and simply cannot supply enough current to maintain the light output, so it decreases - and so does surface temperature-


Conclusion

Don't expect to get 165lm for more than 5 minutes when the flashlight is starting at room temperature (but before thermal throttling start your hand won't feel good with that little heater after 3 mins...)
Nevertheless, this little flashlight performs great at low mode (high enough for what it's made for) and provides 165lm if needed, for short times (thanks to thermal throttling you won't get heat burn...).

Keep in mind that the MT06 is not meant to be a tactical kubotan but more to "provide great assistance to engineers, mechanical and medical personnel" (quoting Nitecore). for the late group (medical personnel, this flashlight lacks a firefly/moonloght mode (0.3lm - 3lm) that could be used to perform Pupillary light reflex without blinding the patient...)

Note that although i couldn't see PWM in low mode, i could hear a very little noise (near to ultrasound) that appears both in low mode, and during thermal throttling. Don't worry this sound can only be heard with the pen light close to the hear -i never noticed anything like this on my Fenix LD12.

Tuesday, June 23, 2015

Using a Samsung 2A travel adapter with adaptive fast charging with MotoG : How does it behave? part 2 : more data


Materials and Methods
Trying to keep things objective
See Part one for for the tools used and limitations inherent to the method used.
A few precisions :
  • legend used in graphs:
    • Power-In (W) --> Power used by the samsung AC adapter
    • Power-Out (W) --> Approximated power delivered by the AC adapter
    • Out-disp (mA) --> Current displayed by Ampere App = Current received by the battery
    • Offset : +250mA (= Current used by the device idle, screen ON drain, wifi ON)
    • Offset (WifiOFF) : +160mA (= Current used by the device idle, screen ON drain, wifi OFF)
    • Out-real (mA) --> Current delivered by the AC adapter (out-disp + offset)
    • pm8226 T° (C) --> Temperature of pm8226_tz probe. (MotoG and MotoG 4G/LTE aka Falcon and Peregrine)
    • pm8110 T° (C) --> Temperature of pm8110_tz probe. (MotoE aka Condor)
    • Battery T° (C) --> Temperature given by battery probe
  • ...

Charging and Time
Monitoring battery charge and Current over time

Charging curve is pretty common with a linear charge until 60% and then the rate starts decreasing. Nothing special there.
Charging Current follows the same behavior, showing that the power regulator of the MotoG does its job correctly limiting charging current to safe levels.

Charging and Temperature
Monitoring pm8226 and pm8110 Temperatures and respective charging current over Battery charge

Before showing any graph, we should keep in mind that results are highly inconsistent, T° is directly related to the way device is really idle or not, things can vary from 46 to 57°C!
I had a peak T° of 57°C when using Youtube, twitter and a few services running while charging. Though this peak T° is quickly going down to 52°C and then stabilize at about 50°C back to idle state

Do not use your device for moderate to intensive tasks while charging it (with high power charger) or it will fry!

Concerning OFFline charging, i had no way to monitor, but power used by the AC adapter is still between 7.9 and 8.7W (like ONline charging. the Screen T° felt (the pm8226 module is behind the center of the screen) is as warm as online charging when pm8226 was at about 48°C; obviously a felt T° is not objective.

We can see that the adapter provides a fairly stable current (most variations might due to measurements inaccuracies.) until 60% of charge, then it drops (expected.). Though the power management module that is pm8226 is extremely HOT (50+°C!!) --> Why is that?
  • Doesn't it have an overheat protection? i'd love to investigate this...
  • Is the AC adapter output too powerful for it? No, as we see, the module is able to limit current in the end of charge so it should do it at any time.
  • Is the maximum Current accepted by the device to high for it? Motorola specifies the device to be able to charge with up to 1500mA, 1300 doesn't blow it up! I'm looking on a way to force a limitation to 1000mA and see if there are any improvements in T°


IMPORTANT : work hold on at this stage, i might continue it later. this article is published not to forget the already done part.

Saturday, June 20, 2015

Using a Samsung 2A travel adapter with adaptive fast charging with MotoG : How does it behave? part 1 : first overview

My old Sony-Ercisson 850mA charger is ageing and i needed a new and more powerful one. i Bought the Samsung 2A travel adapter with adaptive fast charging model EP-TA20EWEUGWW (white one, with French 2 pins male plug)
  • We can read everywhere that a charger will only provide what the device is capable to take, is that right?
  • Is that really safe to charge a MotoG (specified to be capable of charging between 550 and 1500mA by the manufacturer) on a 2A adapter?
In the way chargers work, it should be ok, but does the device really behaves the way it is intended to?


Materials and Methods
Trying to keep things objective
  • To monitor input Current:
    A wattmeter:
    It has a precision of +/- 1W that isn't precise at all, but this is only to roughly monitor the input current. ==> this inaccuracy will prevent me to give good efficiency predictions...

  • To "monitor" output current: Ampere
    the app is not meant to be accurate, the idea is only to have an approximation of the current delivered by the charger.
    • The device uses between 180 and 300 mA when idle, screen ON, wifi ON.
    • Ampere mesurements display current applied to the battery, not the one coming from the adapter; so we will add 250mA to the results (or 160 with the experiments without wifi).
    • Therefore if Ampere displays +1000 mA that would mean that the adapter provides about 1250mA and Battery gets 1000mA.
    • Considering previous experiments we can assume that the results are accurate at +/-100mA; this means that when Ampere displays 1000mA, the charger provides something between 1150 and 1350mA (displayed current +250 +/-100)
  • To monitor Temperature:
    Temperature is monitored with the pm8226_tz probe that looks like to be linked with the power manager of the battery -aka battery 'charger' when device is plugged to power source-
Chargers characteristics:
Sony: 5V 850mA
Samsung: 5V 2A or 9V 1.67A with fastcharging capable devicer (EP-TA20EWEUGWW)
For this first experiment the device was discharged down to about 50%


Efficiencies
When results are so inconsistent that you cannot really conclude -_-'
Sony at 50% charge:
  • Input power: 6W +/-1
  • Output power: 3.75~4.75W (5V 750~850mA)
  • Efficiency : 54~95% (worst_case~best_case)
Samsung at 50% charge:
  • Input power: 8W +/-1
  • Output power: 6.35~7.35W(5V 1270~1470mA)
  • Efficiency: 70~105% (No, current is not coming from anywhere, this 105% is due to the +/-1W inaccuracy of the input wattmeter!)

As best case condition cannot be used, let's see for worst cases:
Samsung worst case is above the sony's worst case so we can at least say that this adapter is NOT LESS efficient in this specific condition [50% battery, room temp @21°C ...]. As i don't have enough data yet -and the worst monitoring tools available- i am not able to say that the Samsung Charger is more efficient.


Overheating
When spare Watts become heat?

Sony at 50% charge :
Battery charging current was about 600mA meaning that the charger was providing 850+/-100mA, considering the charger cannot provide more than 850mA, the real value is somewhere between 750 and 850mA.
pm8226_tz T° is about 43°C, this threshold is never exceeded.

Samsung:
  • at 50% charge :
    Battery charging current was about 1120mA meaning that the charger was providing 1370mA+/-100 pm8226_tz rises up to 51°C until the 70-75% of charge are reached,
  • Then (70%+) current is limited to about 800mA and T° decrease slowly to reach 41°C at 80%.
  • At 89% current is only 400mA pm8226_tz only 37°C and the Input current is lowered at 3.2W.
  • When fully charged, idle and screen ON, the adapter still uses 1.9W from home circuit. which means that with an efficiency of about 70% the adapter provides about 226mA which corresponds to the device usage. When screen is OFF, the adapter input current drops under the watmetter detection threshold.

Here is a chart showing Charge Current and pm8226 Temperature against charging percentage.

Now, the questions are,
  • what happens before 50% ?
  • Does the adapter reaches the 1500mA that the device is theorically capable to handle?
  • Is the device really able to handle that much Current ?
  • How does the temperature increase if the device is NOT totally idle while charging?
  • Will the battery survive multiple full charge this way?
Some answers in a few days, after i tried and get more data -and hopefully not fried my device xD-.

Quick Update before the full article : my MotoG power management unit (pm8226) reaches up to 57°C when using it really little while charging, i don't think it is safe at this level of heat ...

If i had better tools, i would try to make accurate charts about :

  • pm8226 and battery T° (C) and Current (mA) against battery charge (%)
  • Battery charge (%) agaisnt time (min)
  • Charger efficiency (%) against Battery charge (%)
  • Monitoring surface T° with a IR camera
  • ...

Monday, November 10, 2014

Quick Review (part3) : Hybrid armor case for MotoG, The PINK one

The black armored case has fully proved itself capable of protecting against shocks. But it's black (i like black, but my girlfriend doesn't).

<<< Part one (unboxing the black case) >>>
<<< Part two (life tested) >>>
<<< Testing tempered glass protector >>>


For her Moto G XT1039 (peregrine), we got a girly Pink build of my own case : 

XT1039 XT1032 armored case


Unboxing

1st overview

This one has been bought from the USA (mine was directly sent from China).

  • Brand name : Asmyna (that's more a re-seller obviously)
  • Declared to be "designed in USA" ==> hmmmm?
  • "ISO 9001:2000 PASSED" ===> How can a product pass "Quality Management" ??? Quality Control is something a product can actually pass, not management.
  • "Made in China" ==> Obviously true.
What's different with the Black Model?
  • Costs the double of my black one (i suppose the travel from China to the USA to Europe is not for nothing there...).
  • Has no screen cover with clip.

XT1039 XT1032 armored case

XT1039 XT1032 armored case pink girly

XT1039 XT1032 armored case pink girly asmyna

XT1039 XT1032 armored case pink girly asmyna


In-Hand

Device protection


The case is well made, and fits perfectly the device
The Pink rubberized paint is nice to touch (Yes, you've just read PAINT.)
XT1039 XT1032 armored case pink girly asmyna

XT1039 XT1032 armored case pink girly asmyna


Pros & Cons

Same as the Black one, plus a little thing...

Let's see :


XT1039 XT1032 armored case pink girly asmyna flaw paint scratch

"- Dafuk is that ?
- Looks like Pink rubber is painted on white plastic!, it will scratch with time and look weird."

The black case had a Black rubber paint on Black tinted plastic resulting in nearly invisible scratches [See Wear and Tear" Part of the previous post]


Recap


  • More expensive than Black Model
  • White plastic painted Pink (and not Pink tinted plastic.)
  • Bad Wear resistant paint hence the white spot that appeared in the first days.
  • No sliding cover to protect screen added to the package.
  • Same other Pros&Cons as Black Model (minus the silicone flaw i had on mine)

So, it is still a good case (if you forget paint wearing), it offers excellent shock protection and has a good quality feeling. 

Though, if you don't really need a Pink or Colored case, prefer the Black one, it is cheaper (if bought from China, i couldn't find the Pink one from there), it also has a sliding cover and wear is hardly noticeable thanks to Black-on-Black Paint.    

Sunday, October 26, 2014

ZappyDay : un système d'enchères basé sur les tests d'applications

ZappyDay : un système d'enchères basé sur les tests d'applications


Déclaration des conflits d'intérêts :
Attention, cet article est 'sponsorisé' (l'utilisation du lien de parrainage pour s'inscrire me fera gagner des points : un bon moyen de me soutenir), il n'est donc potentiellement pas 100% indépendant comme le sont généralement les autres articles de ce blog.

Ayant découvert ZappyDay récemment, j'ai décidé d'essayer ce service pour la simple raison qu'il est gratuit  et offre une bonne raison de tester des applications que je n'aurais pas pensé utiliser un jour.

Le principe :
  • Découvrir et tester des applications à partir d'une liste prédéfinie
  • Recevoir des points lorsque le retour sur expérience est rendu
  • Participer à des enchères à l'aide des points récoltés
La compatibilité :
  • Android
  • iOS (iphone, ipad)
  • Windows phone

La mise en oeuvre :
  • S'inscrire (via ce lien de parrainage)

  • Choisir une application dans la liste

  • Attendre l'e-mail contenant le lien (qui redirige vers le google play par exemple)

  • Télécharger l'application

  • La tester

  • Rendre sa conclusion (ergonomie, utilité, note globale et commentaires)
plusieurs étapes : 
Noter l'application 
 Répondre à la question de vérification (exemple pour Opera Mini)

  • Recevoir les points 


Choisir les 'cadeaux' : via un système d'enchères
Une liste évolutive des cadeaux disponibles permet de choisir quelque chose en posant une enchère : 


Conclusion :


  • ZappyDay est un site qui permet de gagner des cadeaux en téléchargeant des apps
  • ZappyDay est 100% gratuit (presque : cf le Nota Bene à la fin)
  • ZappyDay fonctionne pour les smartphones Apple, Android, et Windows Phone

Si ça vous tente, inscrivez-vous via ce lien  NB :

  • Le téléchargement des applications se fait bien depuis les marchés officiels de chaque plateforme et non via un marché alternatif comme je le craignais au premier abord (une meilleure visibilité de ce point sur le site serait une bonne chose)
  • Il est aussi possible d'acheter des points... même si celà dénature un peu l'idée du 100% gratuit et fait un peu 'pay to win'. Heureusement cette option n'est que très secondaire.

Tuesday, October 14, 2014

Orzly Premium Tempered Glass : Screen Protector

Orzly Premium Tempered Glass : 
Screen Protector for Moto G (Falcon/Peregrine)


Ordered two screen protectors (one for my Falcon, and one for a Peregrine : same Screen, so same Protector)


Features (as claimed on the box)

  • Oleophobic Coating (Orzly Tempered Glass Screen Protectors have an oleophobic coating, this hels prevent fingerprints and other contaminants as well as making it easy to clean).
  • Whole Transparency (The silicone adhesive surface ensures there are no gaps between the screen protector and your screen. This helps to ensure the clarity of your screen is not reduced).
  • 8-9H Surface Hardness (Stronger than PET film screen protectors).
  • 0.24mm thickness (Made from chemically treated, transparent tempered glass, the screen protector is only 0.24mm thick, making it ultra thin and light).
  • Sensitive Touch (Highly responsive with your device's touch screen).
  • Shatter Proof (If shattered, the screen protector breaks into small pieces that do not have sharp edges. This makes them safe to use).


What's in the Box?
  1. Tempered Glass Protector
  2. Alcohol cleaning cloth (wet)
  3. Cleaning cloth (dry)
  4. Applicator card
  5. Dust remover stickers (x2)
  6. How-to
After opening the main box : 
Alcohol cloth, dry cloth and small applicator card, paper box
In the paper box (click to enlarge the pictures and read the How-to) :
Tempered Glasse Screen Protector, 2 stickers, How-to


How to apply?
  1. Go somewhere there is NO dust (a wet atmosphere is recommended, since dust won't fly freely ==> i didn't applied in this conditions, consequently, some dust came in the process (see below)
  2. Remove the previous screen protector used if any
  3. Use  the alcohol cloth to clean the screen surface
  4. Dry the screen with the microfibre (dry) cloth
  5. Use Dust removing stickers to eliminate any residual dust
  6. Pull back the plastic layer (labelled "(1) Please peel off this mask BEFORE application)
  7. Carefully position the screen protector onto the device's screen. Make sure to align correctly the speaker cut out with the screen's one. /!\ at this time, any single piece of dust hanging around in the room will come simply to take your work down /!\
  8. Press down gently at the center of the screen so that the protector's adhesive will spread (mostly no need to press much, positioning on the screen will start spreading)
  9. Use the applicator card to push out the edges (it is said that small bubbles will disappear in 1~2 days ... we'll see... 
  10. Clean the Screen Protector and enjoy :D


Result?
Looks as if there were nothing on the screen ...


But i failed somewhat and a little piece of dust got stuck (creating the small bubbles on the bottom right of the pic, near power button): 
    
Edit : looks like the bubbles are slowly vanishing (silicone layer in action) ... only little light deviation/diffraction due to the very small piece of dust stuck, but it is now so small that only an attentive look allows to see it, no impact on user experience anymore.

Pros & cons
Pros : 

  • Won't get scratched easily as a PET (plastic) film would be
  • Better screen protection than PET film?
  • Better transparency than PET film (and should not get yellowish with time passing)
  • User cannot say if there is a protector or not by finger feeling
  • If well applied, user cannot say there is something on the screen (by sight)
  • regarding package : it is great to have a good looking package AND all accessories needed to perform the application.
Cons :
  • Will break on shock where a PET screen would get slightly deformed but resist.
  • Fingerprints will stick despite Oleophobic coating (not more than with PET film though) 
  • Expensive (got it for 10€ when a PET film costs 1) ==> But worth the price!
  • Thickness is low, but it was nearly too thick to correctly cohabit with my protection case, make sure your case will accept this extra thickness before purchasing!

NB : Application is quite tricky, as much as it is to correctly apply PET film, simply different : so no way to compare both on this side.

Wednesday, September 24, 2014

Quick Review (part2) : Hybrid armor case for MotoG

Quick Review (part2) : Hybrid armor case for MotoG


A while ago (middle of june 2014) i had bought a 'heavy duty' case for my Falcon and made an 'out-of-the-box' review. It is now time to see how it survived to life:


As said in previous review, i didn't use kickstand and pocket clip features that i simply removed.


Device protection

The device fell on the floor a few times without phone destruction (the added thickness above screen protected it, same for camera lens and other vital parts).

Corners of the cases obviously got some little scratches : 

Looks like the rubber part perfectly absorbs shocks and preserves the device.
I didn't pay attention to my falcon at all, being confident with the extra-protection added by the case.


Wear and tear

Blue-Jeans are quite abrasive stuff, so they produce some scratches in the angles


Pretty descent for a 3 month heavy usage (the case have never been removed from device until today)


Dust
Rubber loves dust ...

So here is the inside : 
Less dust stuck there than expected.


And the device??

I can't say it looks like a brand new device, but there are no major flaws    
Funny fact: 
The model number is molded in the rubber part : 

Looks like it is reported on the device's back cover now ...


Conclusion : 
A great case that does the job it is meant to.

  • Efficient: performance and low cost. 
  • Resistant: not much wear and tear despite quite hard conditions
  • Little flaws that had already been pointed out in part1, but are acceptable for the price.
There might be a part 3 in a few months to follow this case ageing...