Tuesday, November 25, 2014

Moto E and Moto G : 2 White LEDs

After my articles about the "Two LEDs" discovered on MotoE (and suspected on MotoG) i received a lot of questions about them : 
Moto G Falcon notification LED charging triggerMoto E Condor notification LED charging trigger

  • Are there really Two LEDs there??
  • Are they really White and not RGB "mis-configured"?

So i made non-destructive tests using a microscope on Moto E:
For some reason, MotoE LED hole is transparent and we can see through it (that's not the case for MotoG)


2 LEDs

The proof that MotoE has 2 LEDs

Here is a picture taken at x100 of the notification LED ON (triggered through /sys/class/leds/white since the brighter one was too bright to allow me to take a pic of it lighten up with my set up)

Moto E Condor notification LEDs x100 microscopy

Each "yellow" rectangle is a LED chip (you can see the two wires on the left one)
This is proof there is two LEDs, i was able to light them both using the following : 


echo 255 >/sys/class/leds/charging/brightness #to light the left and brighter one
echo 255 >/sys/class/leds/white/brightness #to light the one on the right


White LEDs

The proof that Moto E has white only LEDs
Moto E Condor notification white LED microscopy (Blue and phosphor coating)


On the above picture, you can see a closer view of the LED: its inner components and something interesting :

  • there are 2 wires: this should correspond to +/- (proof of Single color LED)
LED basic Scheme from wikipedia[source : Wikipedia]

  • The light emitted is white (that could be RGB set to 255:255:255) BUT, there is a Blue shift (the blue luminescence you can see around the center of the LED) which  corresponds to a Blue LED with a phosphor substract coated on it giving the White light.
BLUE Phosphor coated LED spectrum from wikipedia[source : Wikipedia]


We now know that Moto E has 2 LEDs and that they are White only

I cannot prove it for motoG until complete teardown (the LED hole does not allow to see through it and observe the LEDs) but there are good chances that it also has 2 white LEDs regarding the behavior in previous tests.


Make sure you read these articles to understand how this started :

Monday, November 24, 2014

Moto E Playing with the LED

After we played with Moto G LED, it's time to do the same with MotoE's one :


It's always cool to know at a glance that your device is charging without the need of lighting the screen, here is how:

in /sys/class/leds/charging/trigger we have these triggers available : 

Code:
[none] bkl-trigger usb-online mmc0 mmc1 battery-charging-or-full battery-charging battery-full battery-charging-blink-full-solid bms-online
easy to change them using :
Code:
echo battery-charging >/sys/class/leds/charging/trigger
needs to set any value !=0 for brightness (LED is either ON or OFF on MotoE):
Code:
echo 1 >/sys/class/leds/charging/trigger
Moto E is quite different than Moto G :
If you pay attention, you can se that Moto E has Two little white LEDs soldered under the LED hole, the first one (left) is ruled by ./charging and the second one (less bright, ont the right) is ruled by the ./white.

/sys/class/leds/white/trigger, and /sys/class/leds/white/brightness configure the right LED and these settings are overridden has soon as a notification comes.

/sys/class/leds/charging/trigger and /sys/class/charging/brightness configure the left LED (the brighter one) and these settings are not overridden by notifications AND both can work toghether: 
You can see the left one kept ON while charging (using battery-charging trigger) and the right one Blinking with an incoming notification.


The above has only been tested on stock rooted ROM
Here is the XDA dedicated thread

Moto G : Play with the LED

Moto G has a White-only notification LED (as actual Knowledge, might be proved wrong later on... ==> proof has been given since then)

I miss the RGB led of my X10 mini, and the charging LED notification
We can't override the LED color since it turned out that the LED is White and not RGB, but we can play with the triggers :

in /sys/class/leds/, we can find the following folders (that are symlinks):
  • charging/
  • lcd-backlight/
  • led:flash_0/
  • led:flash_torch/
  • rgb/
  • torch-light/
  • white/
  • wled:backlight/

For a start, let's play with /sys/class/leds/charging/:
  • brightness
  • device/
  • max_brightness
  • power/
  • subsystem/
  • trigger
  • uevent

Brightness

Is that LED dimmable?

adb shell
su
echo 255 /sys/class/leds/charging/brightness


  • Using /sys/class/leds/charging/brightness this LED only takes two states: 0 and 255 (in fact 0 and != 0)
  • Using /sys/class/leds/white/brightness the LED can be set to any value between 0 and 255 (but it is overridden if a notification comes and the value is set bat to 0...


Triggers
Testing and setting the triggers

What are the triggers available ?

catching values :
cat /sys/class/leds/charging/trigger

output:
[none] bkl-trigger usb-online flash0_trigger torch_trigger mmc0 battery-charging-or-full battery-charging battery-full battery-charging-blink-full-solid bms-online 


The ones we know the use :

  • [none] (default, LED does nothing)
  • blk-trigger (used by ./wled:backlight/trigger)
  • usb-online (lights up when USB connected)
  • flash0_trigger (used by ./led:flash_0/trigger)
  • torch_trigger (used by ./led:flash_torch/trigger)
  • mmc0 (I/O triggered, lights when mmc0 is in use)
  • battery-charging-or-full (full time ON LED when charging or charged)
  • battery-charging (full time ON LED when charging)
  • battery-full (full time ON LED when charged)
  • battery-charging-blink-full-solid (blinks until charged)

To get Blinking during charging :
echo battery-charging-blink-full-solid >/sys/class/leds/charging/trigger

making sure it worked:
cat /sys/class/leds/charging/trigger

Output:
none bkl-trigger usb-online flash0_trigger torch_trigger mmc0 battery-charging-or-full battery-charging battery-full [battery-charging-blink-full-solid] bms-online 

Since */charging/brightness does not dimm LED, the LED stays at full power.


Comments

Some Strange behaviors :

During test i was able to show that using /sys/class/leds/charging/trigger overrides any other trigger (if a notification comes, then it won't change the pattern) in fact i recently found that MotoG has 2 LEDs and that they can be lighten up the same way it works for MotoE :

  • /sys/class/leds/charging/trigger → first LED, can be set to on/blinking while charging, although at full brightness.
  •  /sys/class/leds/white/trigger → second LED, can be dimmed, but the LED turns back off when a notification comes in.


Though using /sys/class/leds/white/brightness allows to use 0~255 values to dimm the LED it is overridden by any incoming notification that set brightness back to 0. ==> Cannot be used as battery blinking notification.

For now, the best way is to set "first" LED (/sys/class/leds/charging/) for charging using dedicated trigger and keeping the "second" one to none (and used as notification LED as it is by default) and get both working together this way.
What we need is to find a way to dim the "first" LED


Got the idea to play with LED thanks to carock @XDA

Tuesday, November 18, 2014

Setting up Moto E (XT1022 aka Condor)

From Unlocking bootloader to greenifying... 
A kind of speedrun. 30 minutes are enough from unboxing to the result ;)


Unlocking Bootloader


Unlocking Bootloader

This voids warranty unless you live in EU
#include <std_disclaimer.h>
/*
* Unlocking bootloader wipes your device's data.
* You will loose anything stored in there.
* Backup your files if any.
*/

First of all, we need to set up adb environment, and then unlock bootloader,....

Adding the needed rule to /etc/udev/rules.d

create or edit 99-android.rules
#moto normal mode
SUBSYSTEM=="usb", ATTR{idVendor}=="22b8", ATTR{idProduct}==”2e82″, MODE="0666"
#moto debug mode
SUBSYSTEM=="usb", ATTR{idVendor}=="22b8", ATTR{idProduct}==”2e76″, MODE="0666"
#moto fastboot mode
SUBSYSTEM=="usb", ATTR{idVendor}=="22b8", ATTR{idProduct}==”2e80″, MODE="0666"
#moto global debug 
SUBSYSTEM=="usb", ATTR{idVendor}=="22b8", MODE="0666"

If you don't have adb or fastboot already installed, then install the android SDK


getting unlock code : 
Enable USB debugging on your Condor, and type
adb reboot bootloader

Once you are done, type 
fastboot oem get_unlock_data

You should get something like : 
$ fastboot oem get_unlock_data
 (bootloader) 0A40040192024205#4C4D3556313230
 (bootloader) 30373731363031303332323239#BD00
 (bootloader) 8A672BA4746C2CE02328A2AC0C39F95
 (bootloader) 1A3E5#1F53280002000000000000000
 (bootloader) 0000000

Turn it into something like :

0A40040192024205#4C4D355631323030373731363031303332323239#BD008A672BA4746C2CE02328A2AC0C39F951A3E5#1F532800020000000000000000000000

go to Motorola website, it's now time to check if the device is unlockable :
Is your device unlockable?

Agree, and request the key:


Get your Unlock Key

Get your email :
Unlock email


Unlocking for Real:

$ fastboot oem unlock UNIQUE_KEY


Wait your device to reboot, you should see this at startup:

Unlock Warning
Don't worry, first boot is really really slow.


Removing Unlock Warning

Fed up with Unlock disclaimer at boot? It's time to fix it.


  • Download this file
  • Extract logo.bin
  • Reboot to fastboot:
  • adb reboot bootloader

  • Open terminal where you logo.bin has been extracted or cd to it.
  • Type:
  • fastboot flash logo logo.bin

  • Reboot:
  • fastboot reboot

  • Enjoy!


Installing Recovery

What's a device without any custom recovery?
CWM Recovery

Download CWM recovery from here

fastboot flash recovery FILENAMEtoFLASH.img


Rooting

Unleash the Dragon sleeping in your device


SuperSU

  • Download SuperSU zip from here
  • Reboot to recovery:
  • adb reboot recovery
  • choose install zip from sideload and type (from a terminal opened in folder that contains SuperSU zip):
  • adb sideload FILENAME.zip
  • Reboot and enjoy RoOt Access!
Isn't that too easy?? 


The following is only there to give clues about how to take advantages of an unlocked/rooted device:


Xposed Framework

Getting Xposed to fully play with your device

Want to learn more about Xposed ?

"Xposed is a framework for modules that can change the behavior of the system and apps without touching any APKs. That's great because it means that modules can work for different versions and even ROMs without any changes (as long as the original code was not changed too much). It's also easy to undo. As all changes are done in the memory, you just need to deactivate the module and reboot to get your original system back. There are many other advantages, but here is just one more: Multiple modules can do changes to the same part of the system or app. With modified APKs, you to decide for one. No way to combine them, unless the author builds multiple APKs with different combinations."
Xposed

Download the installer from here, enable unknown sources and install the framework
==> try these modules to get the best out of your device ;)


Greenify your device!

The best way to prevent unwanted background services


Simply install from the playstore

Greenify

Playstore description : 
"Never should your phone or tablet become slower and battery hungrier after lots of apps installed. With Greenify, your device can run almost as smoothly and lastingly as it did the first day you had it!

Greenify help you identify and put the misbehaving apps into hibernation when you are not using them, to stop them from lagging your device and leeching the battery, in an unique way! They can do nothing without explicit launch by you or other apps, while still preserving full functionality when running in foreground, similar to iOS apps!
"


Since Xposed is installed, don't forget to enable "boost" mode in Experimental features : it will use the power of Xposed Framework through a module to get better performances.


Sources of knowledge :

  • RC-FAQ for Moto G [Collective work to get accurate knowledge]; 
  • FAQ for Moto E [by FalconG, based on RC-FAQ for MotoG]; 
  • How to Unlock BL for Moto G [by myself, now certified to be working for Moto E]; 
  • How to Root by deej_roamer
  • Motorola documentation

Sunday, November 16, 2014

Xposed & Moto E (XT1022 aka Condor)


Xposed & Moto E

For Moto E set-up for 'standard End-User' in addition to Motorola Stock ROM : 


  • Acdisplay by AChep (Apps' additional module)
  • Greenify by oasisfeng (Apps' additional module)
  • GravityBox [KK] by C3C076
  • Remove MotoG second SIM icons by MohammadAG (works perfectly on Moto E XT1022)
  • Battery Home Icon by MohammadAG 


  • >>> for moto G <<<

    Saturday, November 15, 2014

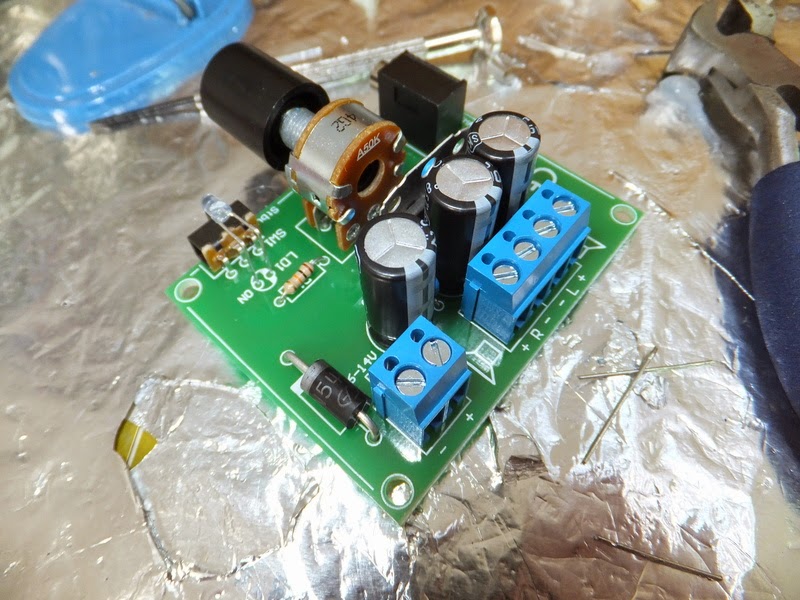
    2x5W Amplifier for mp3 player or line output (MK190) (part2)

    Having something that works is ok, having something that works AND looks good is better:

    Here is the result of recycling Hercule XPS 2.0 10 Left channel box (the right speaker was dead so i simply swapped left/right speakers, removed right one and made a stereo>mono trick to get the whole signal toward left-that-became-right speaker)

    This is based on the previously made MK190, slightly adapted to fit in the XPS speaker housing.

    Additional stuff needed to complete the work : 

    • 1 ON-ON switch
    • 1 Four ports spring clip speaker wire connector block
    • 1 Metal LED housing
    • 1 Circular power connector
    • Some wires took from out of order ATX-PSU
    • Black plastic sheet hanging around
    • 2 torx screws taken from the HP AiO used for the RGB LED project
    • Hot glue


    Unsoldering

    Needed-to-be-changed components


    <=== Before

                                                    After ===>

    1. New switch
    2. LED and its new housing + wires
    3. Potentiometer "plugged" in a drilled hole
    4. Line-in jack 3.5 plug
    5. New power connector 
    6. Kept the screw-able speaker ports for later modularity.


    Assembling

    Trying to get the best of the available

    Assembling the Four ports spring clip speaker wire connector block, the Black plastic sheet (to cover the removed Speaker space) and the main housing


    No screw at the bottom-right of the plastic sheet since the PCB is there
    The plastic sheet had been machined (both sides) so the PCB don't push much and prevent from closing the main housing. It is hidden by the cover.


    Result

    giving trash a new life
    From left-to-right :
    • Speaker plug
    • Line-in Jack
    • Potentiometer knob and LED
    • Power switch


    The 6-14V input : 


    What's next?


    Monday, November 10, 2014

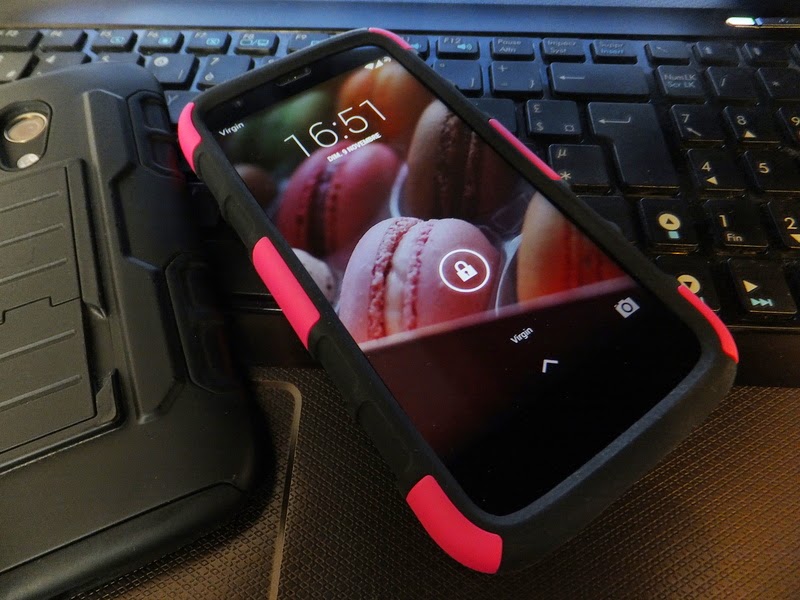
    Quick Review (part3) : Hybrid armor case for MotoG, The PINK one

    The black armored case has fully proved itself capable of protecting against shocks. But it's black (i like black, but my girlfriend doesn't).

    <<< Part one (unboxing the black case) >>>
    <<< Part two (life tested) >>>
    <<< Testing tempered glass protector >>>


    For her Moto G XT1039 (peregrine), we got a girly Pink build of my own case : 

    XT1039 XT1032 armored case


    Unboxing

    1st overview

    This one has been bought from the USA (mine was directly sent from China).

    • Brand name : Asmyna (that's more a re-seller obviously)
    • Declared to be "designed in USA" ==> hmmmm?
    • "ISO 9001:2000 PASSED" ===> How can a product pass "Quality Management" ??? Quality Control is something a product can actually pass, not management.
    • "Made in China" ==> Obviously true.
    What's different with the Black Model?
    • Costs the double of my black one (i suppose the travel from China to the USA to Europe is not for nothing there...).
    • Has no screen cover with clip.

    XT1039 XT1032 armored case

    XT1039 XT1032 armored case pink girly

    XT1039 XT1032 armored case pink girly asmyna

    XT1039 XT1032 armored case pink girly asmyna


    In-Hand

    Device protection


    The case is well made, and fits perfectly the device
    The Pink rubberized paint is nice to touch (Yes, you've just read PAINT.)
    XT1039 XT1032 armored case pink girly asmyna

    XT1039 XT1032 armored case pink girly asmyna


    Pros & Cons

    Same as the Black one, plus a little thing...

    Let's see :


    XT1039 XT1032 armored case pink girly asmyna flaw paint scratch

    "- Dafuk is that ?
    - Looks like Pink rubber is painted on white plastic!, it will scratch with time and look weird."

    The black case had a Black rubber paint on Black tinted plastic resulting in nearly invisible scratches [See Wear and Tear" Part of the previous post]


    Recap


    • More expensive than Black Model
    • White plastic painted Pink (and not Pink tinted plastic.)
    • Bad Wear resistant paint hence the white spot that appeared in the first days.
    • No sliding cover to protect screen added to the package.
    • Same other Pros&Cons as Black Model (minus the silicone flaw i had on mine)

    So, it is still a good case (if you forget paint wearing), it offers excellent shock protection and has a good quality feeling. 

    Though, if you don't really need a Pink or Colored case, prefer the Black one, it is cheaper (if bought from China, i couldn't find the Pink one from there), it also has a sliding cover and wear is hardly noticeable thanks to Black-on-Black Paint.    

    Saturday, November 8, 2014

    PWM controlled RGB lamp (part3)

    Soldering wires to the RGB+ pins :  a better way. (than part 1)

    This continues part 1 and 2.

    The result had to be : 
    • Modular (plug)
    • Easy to use
    • Not too big.
    1/ making the plug:
    Plug soldering

    Due to recycling, i don't have many colours in small wires so, Red == Red, Yellow == Green, Blue == Blue,  and White == Vcc. (this will get much more complicated soon ;-))


    2/ Soldering to Pins:
    On the Plug i want RGB in order so it is Red-Green-Blue-Vcc
    But on the LED pins, the order is Vcc-Blue-Red-Green


    soldering plug wires to LED pins


    3/ Drilling holes for the plug and writing RGB+:

    another sight on the plug

    RGB+

    "- What the hole!
    - Hey, no one is perfect. >_<"

    4/ Insulating and testing the plug:
    Insulating the plug
    "- Wait, what? you plugged White to Brown, and Red to Yellow ??
    - Yes, i did, remember that's recycling, so... i'm using what i can!"


    5/ Only and Arduino is needed to complete that project now :)

    part 4 pending ....

    Thursday, November 6, 2014

    PWM controlled RGB lamp (part2)

    (2/?)

    >>> Part one<<<
    >>> Part Three <<<

    I recently got another old/trashed HP all-in-one scanner-printer, and took the RGB lamp as well as a bunch of motors, gears, and stuff.


    This time, there are pics of the scanner piece before complete take-apart : 


    HP all-in-one (AIO) scanner lamp

    HP AIO scanner part upside down


    Now that i have a new lamp, it is time to disassemble the old one :
    HP AIO scanner lamp disassembled

    Wait, What ??? that's not a bunch LEDs like i thought first, but a single RGB LED and a clear plastic reflector!


    The LED (only green isn't burnt on this old lamp):

    zoom on the HP Scanner LED

    The LED with green ON:
    HP scanner RGB LED lighten up

    Same, but with f/11 and 1/80 sec.:
    HP scanner RGB LED lighten up


    With the plastic piece that reflects an diffuses light all along (same pic settings):
    HP scanner RGB LED lighten up with reflector

    Although, it is one LED, the use of recycling this part is keeping it as is : perfect to make an atmosphere lamp.

    A PWM supply is now needed to correctly monitor all this :)

    >>> Read Part 3 <<<

    Wednesday, November 5, 2014

    Master PDF Editor


    Quick overview of Master PDF editor, another (user-friendly) PDF editor: 


    >>> completing an old post about editing PDF on Linux <<<

    This will only present the most basic features of MasterPDF editor 1.9.25.


    Open the PDF you want to edit, here is a basic example of what teachers can give to students and say "simply print it, and you're done!" : 


    Remove the Black Background, usually it is a picture, select it, and press suppr.

    Ooooops, looks like text disappeared?

    Use the "text selector tool"

    Now Select with a long click the whole area (ctrl+a doesn't work : it will select both text and non-text objects)


    Choose color to fill the selected text:


    There is no way to invert colors in that software, but it is easy to export the image, edit it with your favorite image editor and then re-insert it.


    As this software doesn't provide a tool to make arrows, make a pool of arrows with another one, and paste them there.


    Now we have a Printer-friendly pdf :D