Showing posts with label Customization. Show all posts

Wednesday, October 14, 2015

Quickie#4 CM12.1 vs Exodus ROM: CPU/GPU

After Pure SQLite databases transactions performances, it is time to have a look at CPU/GPU pure performances (meaning benchmarking, not real-life ...)


CPU
RgbenchMM

both ROMs were tested on RgbenchMM (4 threads):

On this Benchmark, CM12.1 is slightly ahead in performances (this has no real-life impact though)


GPU: 2D
fps2D

For 2D graphics, i use fps2D, and old app that is quite great for the purpose (an keeping it helps looking back in the ages and see progression.

No, there is absolutely NO single difference regarding 2D performances. a 0.1 fps difference with a standard deviation of 10fps is not significant at all!

GPU: 3D
GPUbench


Looking at average fps performance on this benchmark shows less than 1 fps difference between the two ROMs. lowest and highest are much more variable (look at stdev!) and thus cannot be compared.

What about the score?

Looks like CM12.1 gets some higher scores here? Right, but mainly because the Benchmark didn't recognized the same screen resolution (although both are set to 320dpi [default]) ==> normalized scores are similar. This might need further investigations.

Conclusion
regarding CPU/GPU

  • Contrary to the huge performance increase in SQLite (up to 900%!!) CPU/GPU performances are not better (even a little behind? not sure we can say that) on Exodus compared to CM12.1
  • So after hours of benchmarking, i couldn't show Exodus superiority here. So for people wanting a pure CM experience there is no point switching to Exodus of Falcons (XT1032 at least.) to burst CPU/GPU Benchmarks.
  • Nevertheless, those ROMs are pretty similar but Exodus features lots of things CM12.1 doesn't which is not something to throw out!
  • Later we will try to see if various other points of comparison can (or not?) differenciate Exodus from CM12.1.
    But are we really searching overkill performances in Exodus on Falcon? I personally don't. CM12.1 is a great stable base that gave me all i wanted for a while (Features and performance wise).
    What i searched for in Exodus is not extra performances, but extra features (Pie, navigation bar customs, bottom right clear-recent, ...)

Tuesday, October 13, 2015

Quickie#3 CM12.1 vs Exodus ROM : SQLite performance

Having two devices with similar hardware helps a lot for "real-time" comparisons of different ROM at a given time. Here we are comparing CM12.1 (20151012 nightly) with Exodus ROM (based on 12.1 ... 20151012) regarding SQLite databases performances, this is not like a full ROM versus, simply a comparison on a very specific point.


The devices
Similar Hardware ? yes, and no...

The two devices are both XT1032, with pretty similar hardware, but with some differences regarding memory :
*Device 1Device 2
ROMCM12.1Exodus
eMMC8GB Sandisk16GB Toshiba
/data file systemF2FSF2FS
DRAM1024MB Samsung S41024MB Hynix S4

(does this adds a significant bias? hmmm maybe, but it won't explain the gigantic differences seen later)


Benchmarking
AndroBench 4.1

Here i am testing pure SQLite performances with AndroBench 4.1 on both devices using BFQ scheduler (default CM and Exodus I/O scheduler since quite a while)-results in Transactions Per Seconds (TPS)-


Exodus-BFQ CM12-BFQ

average stdev average stdev
SQLite Insert 1241,40 21,19 116,22 4,48
SQLite Update 632,82 12,41 107,78 2,82
SQLite Delete 952,57 16,57 118,21 5,81


Looks like there's quite a big difference... isn't it?
In day to day usage i don't feel much gap between those two ROMs, but this specific benchmark shows that Exodus had more in-depth optimizations regarding SQLite database operations

Discussing bias:
  • Memory brand is different, your results are messed up: No, in fact other devices (aka Moto E 1st gen [XT1022, eMMC: Hynix, DRAM 1024MB Hynix S4, Snapdragon200] or MotoG 2d gen) show similar results on CM12.1 (or even lower for the MotoE). So even if the brand may have a little impact on performance, it won't explain the 10^1 between results.
  • As Processing unit has a fairly big impact on I/O performances, both devices are featuring a Snapdragon 400 @1.2GHz, Interactive governor, MP decision enabled.
  • Is choosing BFQ as scheduler impacts results? and why choosing it? BFQ is the default scheduler for both CM12.1 and Exodus, for this simple reason there is no point testing another in first-line. Plus it could be interesting to see if the optimizations have been directly applied to this specific scheduler or if they are more system-wide. On previous tests i couldn't show any difference in performance between BFQ and Fiops regarding SQLite Update or Delete operations.
  • SQLite databases are not reflecting real-life performance though, so this only shows a very little part of everything -but should make benchmarks addicts happy ;-) -

Tuesday, August 25, 2015

Quickie #2: protecting Fenix LD12 side switch

The Fenix LD12 is quite powerful (125Lm) and small size (powered a single AA cell); the flashlight is quite tough with it aluminum body but it has two weaknesses : the rubber capped buttons.

To keep the flashlight waterproof, these rubber capped buttons needs not to be altered. I already needed to change the back On/Off button due to untimely leak but its construction doesn't allow to protect it; though we can protect the side button (replaced by a steel capped button on cutting edge Fenix flashlights!)
Which material could be used for that purpose?
A few possibilities were allowed to protect the side buttons. We needed the material to respect some characteristics :
  • Being firmly wrapped around the LD12 body
  • Strong enough not to get worn to quickly
  • Springy enough to allow the button under it to be pressed

What about using heat shrink tubing usually aimed toward electrical isolation?
When heated these tubes shrinks and wrap firmly around the underneath material (whatever it is...).
It is available in a large range of diameters : at home it had it in 1,3, 4.5 and 6mm... but it exist in 12.5, 25 and even 35 or 75mm...
Once shrunk, it resists quite well to tearing, scratching and break through (i used a dentist toothpick):

It looks like the perfect candidate for the job!

Let's wrap!

  1. Cut the tube at the right length, with heat it will shrink (in diameter) but length won't be altered
  2. hold the tube carefully: mainly if it was stored flattened.
  3. heat gently a little area with a soldering iron until you get one shrunk ring (3-6mm wide), starting from the collar
    (NB: try to heat homogeneously or you'll get thicker areas where the tube gets heated too long)
  4. repeat, moving little by little until all the tube has shrunk firmly around the body and press with your fingers after each step -before it cools down-(take care not to overheat the side button!! if your fingers are burnt while pressing... it was too hot!)
  5. finish with the Flashlight head
  6. re-heat area that aren't shrunk enough
  7. Press button area after heating a second time to get the button layout appearing (heating too much will make the tube thicker and you won't see the layout after pressing)

The Flashlight is now more wear/break-through/scratch proof (the side button at least). The result is far from perfect, but that was a first try!

Tuesday, June 9, 2015

CM12.1 : A few Drawbacks

I'm using CyanogenMod ROMs since the very beginning (started with a fork of CM6 called MiniCM6 by XDA Recognized Developer nobodyAtall).

Every CM version since then had more and more features, less and less bugs: the Sony-Ericsson X10mini (e10i, aka Robyn) started with the 'well-known' "SDcard safe to remove" reboot bug that crashed the device twice a day in the early miniCM6 ages...,
CM12.1 on Falcon (Motorola MotoG, XT1032) is far from this, a lot more mature, but still lacks a few things


CyanogenMod Logo
CM12.1
Some lacking Features and some issues

Here is a list of a few things that bothers me in CM12.1. Don't take it wrong, CM12.1 is nice and works pretty well, the following list is only a few "cosmetic" issues, user-experience related.

  • Expanded Desktop
    • Sometimes the nav bar doesn't show up when swiping up. (It needs to swipe down to display notifications, and then, nav bar shows up)
    • On some specific apps the nav bar is "ghost" meaning that once displayed (after swiping up) touching return buttons behaves as if the user had touched the content behind [like an ad........])
  • "Per App" Expanded desktop
    • Enabled for all is nice,
    • Per app settings is nice, -when "Enabled for all" is un-checked-
    • BUT why can't we make per app customisation, when "Enabled for All" is checked? that would help when the user wants the expanded desktop to be enabled for NEARLY all apps, but keeping a few apps with both nav and status bar.
  • 'The random Black Screen' with AmbientDisplay (with wave to wake, an pocket mode enabled)
    • In some rare cases, getting a notification wakes the device, but screen goes black (the only way to "fix" is force rebooting the device). Still no way to reproduce found yet,
  • LiveDisplay : Automatic settings
    • Automatic settings only work when location is enabled. A great addition would be to set time of start and time of end of 'night-mode' as whe can do with F.lux or RedShift for users that don't keep location enabled all-the-time.
  • LMK, is that really an issue?

Feel free to comment below, and i will update this article with your own feelings about the lacking features and the issues that bother you in CM12.1 (don't forget to tell your device if the issue is specific to a branch

For those complaining about Battery Life, don't forget to read this article ;-)

Monday, April 20, 2015

DIY of the day: Adding heat spreader to Value RAM modules

If you are not building a hardcore gaming computer, then some "Value" RAM modules can be enough. The modules (if made by well known brands like Corsair, G.Skill, ...) are still high quality but does not feature any heatspreader, from my own experiments those heatspreaders are not mandatory as RAM modules does not create much heat.
Though heatspreaders are usually cool and good looking: If you have some old modules with ones, why not swapping them to the newly bought modules?
Removing the Heatspreaders from old modules
Disclaimer: your warranty is now void!
Get the modules, find the metal clips (on my G.Skill modules, they are not painted). Lift one with your finger nail: it should jump easily.
Repeat for the second clip.
Swapping Modules
The tricky part
NB: Don't forget to remove the label from the new modules (this voids warranty.)
On my Corsair modules the labels could be easily removed without tearing: i reused them later.
Once the clips are gone, the heat spreader will unfold open. It's time to swap the RAM modules:
/!\ Be extremely careful on the side facing you ==> the labelled side is ALWAYS looking toward the CPU on ATX Motherboards
  1. Once roughly adjusted, fold back.
  2. Make sure to adjust the Heatspreader position without tearing or wearing the heat-pad (grey part on the picture), do not press it to tight either.
  3. place the clips back in place: you should hear a "click" and the clips should be in the state they were before unfolding.
If the labels survived the swap, then add them back to the heatspreader to identify the "CPU-looking" side of the modules. You can also use any other way to ease one-sight identification.
You now have your brand new value modules skinned as higher class ones, they won't reach a much lower CAS Latency, but might be able to support some more overclocking.
And... they simply look cool if not cooler than before

Thursday, January 8, 2015

CM12 and MotoG

First overview Tip and Tricks


Here are some things i found after playing a little with CM12-20150108 Nightly :


How to get root ?
  1. Enable Dev settings (multiple tap on "Build Number" in /settings/about phone/)
  2. Go to Dev settings
  3. Root access : Change to Apps and ADB

How to get Terminal app back?

It is now disabled by default, simple enable it in Dev Settings by toggling "Local Terminal"


That's all for today folks!

This blog might be totally reworked in the coming months but i don't have much time at the moment...

Monday, December 8, 2014

Installing Opera 26 and Adobe Flash Player? Pepper Flash!

After the Linux Mint 17.1 upgrade, why not trying Opera 26 ? (Opera had not been updated for Linux since Opera 12 before this new release)
Getting to the Opera Web Page and downloading the x64-only .deb :


Installing the deb package : (the package will seek for dependencies)


If you want Opera to get its updates with system updates, then :

Need Adobe Flash Player ?
What about using Pepper flash instead of Adobe oldies?


sudo apt-get install pepperflashplugin-nonfree

Restarting Opera, and we're done!


Tuesday, November 25, 2014

Moto E and Moto G : 2 White LEDs

After my articles about the "Two LEDs" discovered on MotoE (and suspected on MotoG) i received a lot of questions about them : 
Moto G Falcon notification LED charging triggerMoto E Condor notification LED charging trigger

  • Are there really Two LEDs there??
  • Are they really White and not RGB "mis-configured"?

So i made non-destructive tests using a microscope on Moto E:
For some reason, MotoE LED hole is transparent and we can see through it (that's not the case for MotoG)


2 LEDs

The proof that MotoE has 2 LEDs

Here is a picture taken at x100 of the notification LED ON (triggered through /sys/class/leds/white since the brighter one was too bright to allow me to take a pic of it lighten up with my set up)

Moto E Condor notification LEDs x100 microscopy

Each "yellow" rectangle is a LED chip (you can see the two wires on the left one)
This is proof there is two LEDs, i was able to light them both using the following : 


echo 255 >/sys/class/leds/charging/brightness #to light the left and brighter one
echo 255 >/sys/class/leds/white/brightness #to light the one on the right


White LEDs

The proof that Moto E has white only LEDs
Moto E Condor notification white LED microscopy (Blue and phosphor coating)


On the above picture, you can see a closer view of the LED: its inner components and something interesting :

  • there are 2 wires: this should correspond to +/- (proof of Single color LED)
LED basic Scheme from wikipedia[source : Wikipedia]

  • The light emitted is white (that could be RGB set to 255:255:255) BUT, there is a Blue shift (the blue luminescence you can see around the center of the LED) which  corresponds to a Blue LED with a phosphor substract coated on it giving the White light.
BLUE Phosphor coated LED spectrum from wikipedia[source : Wikipedia]


We now know that Moto E has 2 LEDs and that they are White only

I cannot prove it for motoG until complete teardown (the LED hole does not allow to see through it and observe the LEDs) but there are good chances that it also has 2 white LEDs regarding the behavior in previous tests.


Make sure you read these articles to understand how this started :

Monday, November 24, 2014

Moto E Playing with the LED

After we played with Moto G LED, it's time to do the same with MotoE's one :


It's always cool to know at a glance that your device is charging without the need of lighting the screen, here is how:

in /sys/class/leds/charging/trigger we have these triggers available : 

Code:
[none] bkl-trigger usb-online mmc0 mmc1 battery-charging-or-full battery-charging battery-full battery-charging-blink-full-solid bms-online
easy to change them using :
Code:
echo battery-charging >/sys/class/leds/charging/trigger
needs to set any value !=0 for brightness (LED is either ON or OFF on MotoE):
Code:
echo 1 >/sys/class/leds/charging/trigger
Moto E is quite different than Moto G :
If you pay attention, you can se that Moto E has Two little white LEDs soldered under the LED hole, the first one (left) is ruled by ./charging and the second one (less bright, ont the right) is ruled by the ./white.

/sys/class/leds/white/trigger, and /sys/class/leds/white/brightness configure the right LED and these settings are overridden has soon as a notification comes.

/sys/class/leds/charging/trigger and /sys/class/charging/brightness configure the left LED (the brighter one) and these settings are not overridden by notifications AND both can work toghether: 
You can see the left one kept ON while charging (using battery-charging trigger) and the right one Blinking with an incoming notification.


The above has only been tested on stock rooted ROM
Here is the XDA dedicated thread

Moto G : Play with the LED

Moto G has a White-only notification LED (as actual Knowledge, might be proved wrong later on... ==> proof has been given since then)

I miss the RGB led of my X10 mini, and the charging LED notification
We can't override the LED color since it turned out that the LED is White and not RGB, but we can play with the triggers :

in /sys/class/leds/, we can find the following folders (that are symlinks):
  • charging/
  • lcd-backlight/
  • led:flash_0/
  • led:flash_torch/
  • rgb/
  • torch-light/
  • white/
  • wled:backlight/

For a start, let's play with /sys/class/leds/charging/:
  • brightness
  • device/
  • max_brightness
  • power/
  • subsystem/
  • trigger
  • uevent

Brightness

Is that LED dimmable?

adb shell
su
echo 255 /sys/class/leds/charging/brightness


  • Using /sys/class/leds/charging/brightness this LED only takes two states: 0 and 255 (in fact 0 and != 0)
  • Using /sys/class/leds/white/brightness the LED can be set to any value between 0 and 255 (but it is overridden if a notification comes and the value is set bat to 0...


Triggers
Testing and setting the triggers

What are the triggers available ?

catching values :
cat /sys/class/leds/charging/trigger

output:
[none] bkl-trigger usb-online flash0_trigger torch_trigger mmc0 battery-charging-or-full battery-charging battery-full battery-charging-blink-full-solid bms-online 


The ones we know the use :

  • [none] (default, LED does nothing)
  • blk-trigger (used by ./wled:backlight/trigger)
  • usb-online (lights up when USB connected)
  • flash0_trigger (used by ./led:flash_0/trigger)
  • torch_trigger (used by ./led:flash_torch/trigger)
  • mmc0 (I/O triggered, lights when mmc0 is in use)
  • battery-charging-or-full (full time ON LED when charging or charged)
  • battery-charging (full time ON LED when charging)
  • battery-full (full time ON LED when charged)
  • battery-charging-blink-full-solid (blinks until charged)

To get Blinking during charging :
echo battery-charging-blink-full-solid >/sys/class/leds/charging/trigger

making sure it worked:
cat /sys/class/leds/charging/trigger

Output:
none bkl-trigger usb-online flash0_trigger torch_trigger mmc0 battery-charging-or-full battery-charging battery-full [battery-charging-blink-full-solid] bms-online 

Since */charging/brightness does not dimm LED, the LED stays at full power.


Comments

Some Strange behaviors :

During test i was able to show that using /sys/class/leds/charging/trigger overrides any other trigger (if a notification comes, then it won't change the pattern) in fact i recently found that MotoG has 2 LEDs and that they can be lighten up the same way it works for MotoE :

  • /sys/class/leds/charging/trigger → first LED, can be set to on/blinking while charging, although at full brightness.
  •  /sys/class/leds/white/trigger → second LED, can be dimmed, but the LED turns back off when a notification comes in.


Though using /sys/class/leds/white/brightness allows to use 0~255 values to dimm the LED it is overridden by any incoming notification that set brightness back to 0. ==> Cannot be used as battery blinking notification.

For now, the best way is to set "first" LED (/sys/class/leds/charging/) for charging using dedicated trigger and keeping the "second" one to none (and used as notification LED as it is by default) and get both working together this way.
What we need is to find a way to dim the "first" LED


Got the idea to play with LED thanks to carock @XDA

Tuesday, November 18, 2014

Setting up Moto E (XT1022 aka Condor)

From Unlocking bootloader to greenifying... 
A kind of speedrun. 30 minutes are enough from unboxing to the result ;)


Unlocking Bootloader


Unlocking Bootloader

This voids warranty unless you live in EU
#include <std_disclaimer.h>
/*
* Unlocking bootloader wipes your device's data.
* You will loose anything stored in there.
* Backup your files if any.
*/

First of all, we need to set up adb environment, and then unlock bootloader,....

Adding the needed rule to /etc/udev/rules.d

create or edit 99-android.rules
#moto normal mode
SUBSYSTEM=="usb", ATTR{idVendor}=="22b8", ATTR{idProduct}==”2e82″, MODE="0666"
#moto debug mode
SUBSYSTEM=="usb", ATTR{idVendor}=="22b8", ATTR{idProduct}==”2e76″, MODE="0666"
#moto fastboot mode
SUBSYSTEM=="usb", ATTR{idVendor}=="22b8", ATTR{idProduct}==”2e80″, MODE="0666"
#moto global debug 
SUBSYSTEM=="usb", ATTR{idVendor}=="22b8", MODE="0666"

If you don't have adb or fastboot already installed, then install the android SDK


getting unlock code : 
Enable USB debugging on your Condor, and type
adb reboot bootloader

Once you are done, type 
fastboot oem get_unlock_data

You should get something like : 
$ fastboot oem get_unlock_data
 (bootloader) 0A40040192024205#4C4D3556313230
 (bootloader) 30373731363031303332323239#BD00
 (bootloader) 8A672BA4746C2CE02328A2AC0C39F95
 (bootloader) 1A3E5#1F53280002000000000000000
 (bootloader) 0000000

Turn it into something like :

0A40040192024205#4C4D355631323030373731363031303332323239#BD008A672BA4746C2CE02328A2AC0C39F951A3E5#1F532800020000000000000000000000

go to Motorola website, it's now time to check if the device is unlockable :
Is your device unlockable?

Agree, and request the key:


Get your Unlock Key

Get your email :
Unlock email


Unlocking for Real:

$ fastboot oem unlock UNIQUE_KEY


Wait your device to reboot, you should see this at startup:

Unlock Warning
Don't worry, first boot is really really slow.


Removing Unlock Warning

Fed up with Unlock disclaimer at boot? It's time to fix it.


  • Download this file
  • Extract logo.bin
  • Reboot to fastboot:
  • adb reboot bootloader

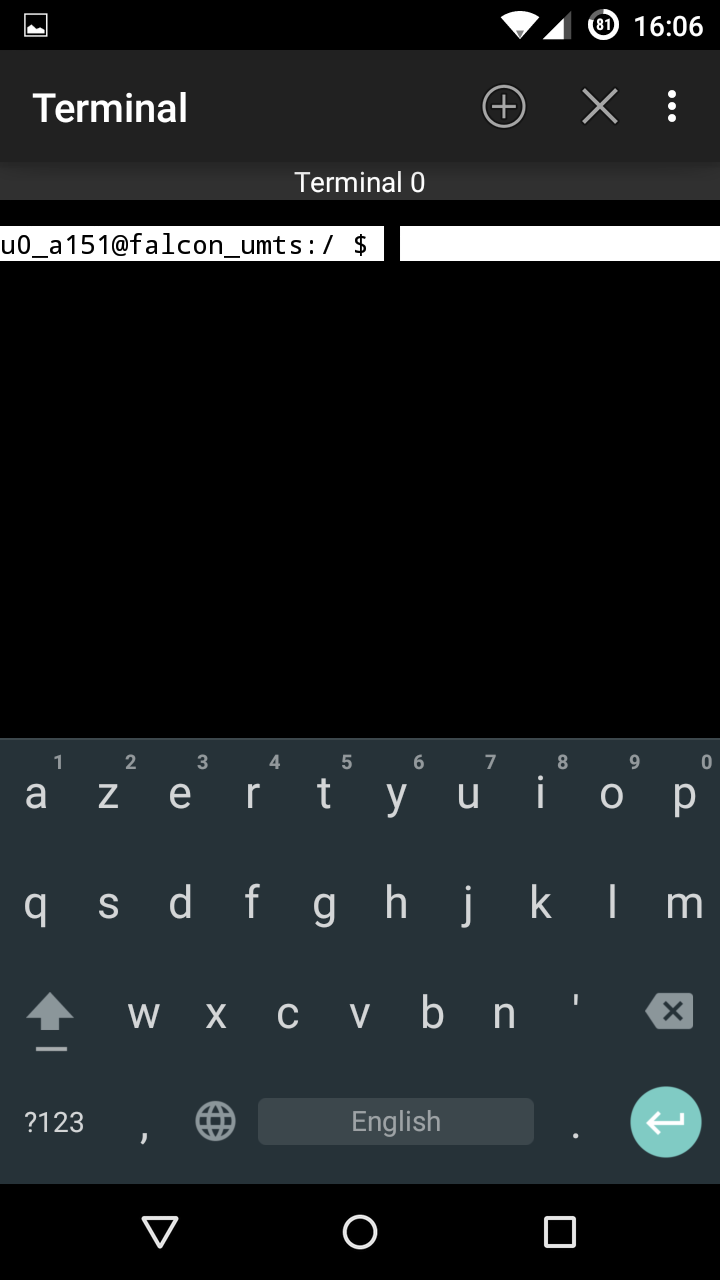
  • Open terminal where you logo.bin has been extracted or cd to it.
  • Type:
  • fastboot flash logo logo.bin

  • Reboot:
  • fastboot reboot

  • Enjoy!


Installing Recovery

What's a device without any custom recovery?
CWM Recovery

Download CWM recovery from here

fastboot flash recovery FILENAMEtoFLASH.img


Rooting

Unleash the Dragon sleeping in your device


SuperSU

  • Download SuperSU zip from here
  • Reboot to recovery:
  • adb reboot recovery
  • choose install zip from sideload and type (from a terminal opened in folder that contains SuperSU zip):
  • adb sideload FILENAME.zip
  • Reboot and enjoy RoOt Access!
Isn't that too easy?? 


The following is only there to give clues about how to take advantages of an unlocked/rooted device:


Xposed Framework

Getting Xposed to fully play with your device

Want to learn more about Xposed ?

"Xposed is a framework for modules that can change the behavior of the system and apps without touching any APKs. That's great because it means that modules can work for different versions and even ROMs without any changes (as long as the original code was not changed too much). It's also easy to undo. As all changes are done in the memory, you just need to deactivate the module and reboot to get your original system back. There are many other advantages, but here is just one more: Multiple modules can do changes to the same part of the system or app. With modified APKs, you to decide for one. No way to combine them, unless the author builds multiple APKs with different combinations."
Xposed

Download the installer from here, enable unknown sources and install the framework
==> try these modules to get the best out of your device ;)


Greenify your device!

The best way to prevent unwanted background services


Simply install from the playstore

Greenify

Playstore description : 
"Never should your phone or tablet become slower and battery hungrier after lots of apps installed. With Greenify, your device can run almost as smoothly and lastingly as it did the first day you had it!

Greenify help you identify and put the misbehaving apps into hibernation when you are not using them, to stop them from lagging your device and leeching the battery, in an unique way! They can do nothing without explicit launch by you or other apps, while still preserving full functionality when running in foreground, similar to iOS apps!
"


Since Xposed is installed, don't forget to enable "boost" mode in Experimental features : it will use the power of Xposed Framework through a module to get better performances.


Sources of knowledge :

  • RC-FAQ for Moto G [Collective work to get accurate knowledge]; 
  • FAQ for Moto E [by FalconG, based on RC-FAQ for MotoG]; 
  • How to Unlock BL for Moto G [by myself, now certified to be working for Moto E]; 
  • How to Root by deej_roamer
  • Motorola documentation