Tuesday, October 28, 2014

PWM controlled RGB scanner lamp

PWM controlled RGB :  old scanner lamp
(1/?)

>>> part two available here <<<
>>> part three available here <<<


Cool things can be done with old trashed electronics, today an old All-in-One printer/scanner from HP will be disassembled on the hotel of science *sigh*


There are a very few things about recycling scanner lamps on the internet, mostly incomplete information. This post ins't to make exhaustive WIP, but giving a few more leads towards success...


This WIP will be based on the following : 


  • LANp (which uses a 5 pins RGB lamp instead of 4 like there is on my HP one)
  • instructables.com "printer scanner light" (that doesn't talk about PWM)
  • instructables.com "Scanner light hack" (that uses a battery instead)


1/ Finding the positive pin and the RGB ones
on these lamps, there is 4 pins used, one is the positive (usually +5VCC, but i'm not sure if 5V is (it was not in fact) really the nominal voltage for this specific HP lamp)...

Canon lamps have 5 pins, so it can't help to find which of the 4 is which ...
A comment on instructables gave the following for HP lamps : 


I made some tests and it appeared to be right!
on mine it is Blue-Green-Red-VCC


Though, the pins here are too small for the available wires and soldering iron... Turned out with continuity tests that the 4 pins at the left are linked to these on the slot... but in a reversed (messed) order!


  • VCC
  • Red
  • Blue
  • Green


2/ Soldering wires
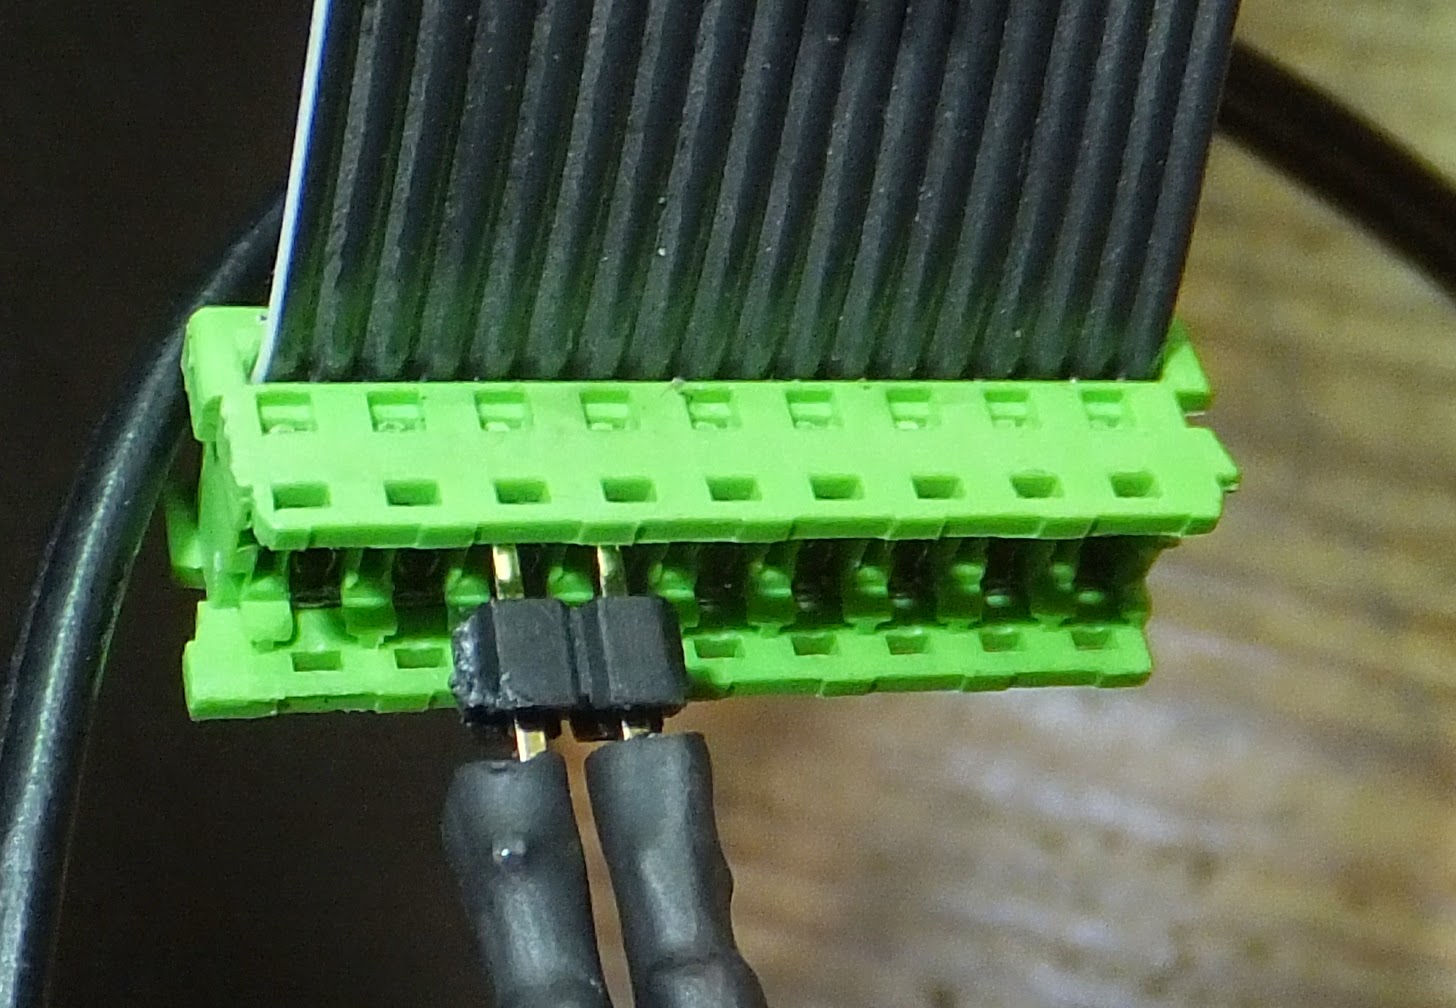
While taking apart the VHS-PSU i got some ribbon cables, a new life for one of them : 

from left-to-right : VCC, Red, Blue, and Green. For easier management, i simply inverted the order while soldering so that i can get RGB sequence at the other end :


 3/ Insulating with hot glue to make sure nothing can short-circuit


4/ Building and insulating the plug 
(VCC is took one pin after on purpose to know where is VCC, and the 3 RGBs.)


5/ Results


6/ Testing and... failing


Worked perfectly as long as it was powered by an old 9V battery (provides only about 5V said my voltmeter)

Red and Blue burnt as soon as i tried a 5VCC supplied by a computer PSU... protected by an adjustable resistor ... accidentally set to 0 ... (who said: "You're Dumb Bro!" ???)

Of course, Don't NOT use without current limiting resistor (you may use ledcalc.com to easy find the one you need)


So this WIP is locked until i find another lamp and an Arduino chip to fully control it with PWM.

Read part two here : getting another scanner lamp.

Sunday, October 26, 2014

Recycling an old VHS-recorder Power Supply (2)

Recycling an old VHS-recorder Power Supply (2)
 ==> Safety First! 

>>> first part available here <<<


Do you remember the "2x5W Amplifier for mp3 player or line output (MK190)" article?

It's now time to make safe connections for the Power Supply Unit : 


Starting from this : 

1/ cutting wires: 


2/ Soldering to female isolated pins:


3/ Adding isolating plastic:


4/ Repeating the process (2 & 3) for the 17 other pins.


5/ Transferring the voltage table on the supply case following the one i set up previously: 


6/ Enjoying the result:


ZappyDay : un système d'enchères basé sur les tests d'applications

ZappyDay : un système d'enchères basé sur les tests d'applications


Déclaration des conflits d'intérêts :
Attention, cet article est 'sponsorisé' (l'utilisation du lien de parrainage pour s'inscrire me fera gagner des points : un bon moyen de me soutenir), il n'est donc potentiellement pas 100% indépendant comme le sont généralement les autres articles de ce blog.

Ayant découvert ZappyDay récemment, j'ai décidé d'essayer ce service pour la simple raison qu'il est gratuit  et offre une bonne raison de tester des applications que je n'aurais pas pensé utiliser un jour.

Le principe :
  • Découvrir et tester des applications à partir d'une liste prédéfinie
  • Recevoir des points lorsque le retour sur expérience est rendu
  • Participer à des enchères à l'aide des points récoltés
La compatibilité :
  • Android
  • iOS (iphone, ipad)
  • Windows phone

La mise en oeuvre :
  • S'inscrire (via ce lien de parrainage)

  • Choisir une application dans la liste

  • Attendre l'e-mail contenant le lien (qui redirige vers le google play par exemple)

  • Télécharger l'application

  • La tester

  • Rendre sa conclusion (ergonomie, utilité, note globale et commentaires)
plusieurs étapes : 
Noter l'application 
 Répondre à la question de vérification (exemple pour Opera Mini)

  • Recevoir les points 


Choisir les 'cadeaux' : via un système d'enchères
Une liste évolutive des cadeaux disponibles permet de choisir quelque chose en posant une enchère : 


Conclusion :


  • ZappyDay est un site qui permet de gagner des cadeaux en téléchargeant des apps
  • ZappyDay est 100% gratuit (presque : cf le Nota Bene à la fin)
  • ZappyDay fonctionne pour les smartphones Apple, Android, et Windows Phone

Si ça vous tente, inscrivez-vous via ce lien  NB :

  • Le téléchargement des applications se fait bien depuis les marchés officiels de chaque plateforme et non via un marché alternatif comme je le craignais au premier abord (une meilleure visibilité de ce point sur le site serait une bonne chose)
  • Il est aussi possible d'acheter des points... même si celà dénature un peu l'idée du 100% gratuit et fait un peu 'pay to win'. Heureusement cette option n'est que très secondaire.

Friday, October 24, 2014

2x5W Amplifier for mp3 player or line output (MK190)

2x5W Amplifier 
for mp3 player or line output

To continue the project of making an Audio Amplifier for my devices (as written when recycling an old power supply), here is the nearly step-by-step WIP : 


MK190
MK190

The kit used is the Velleman MK190 2x5W.

Perfectly noob-friendly protocol:

MK190 manualMK190 manual


Steps 1-3: 
MK190 Printed Circuit BoardMK190 Printed Circuit Board

Step 4:
MK190 Printed Circuit BoardMK190 Printed Circuit Board

Step 5: 
MK190 Printed Circuit BoardMK190 Printed Circuit Board


Steps 6-10: (forgot to take pictures..)
MK190 Printed Circuit BoardMK190 Printed Circuit Board


Step 11:
MK190 Printed Circuit BoardMK190 Printed Circuit Board


MK190 Velleman Module Audio Amplifier 2x5W


Does it work? actually, it does!


MK190 Velleman Module Audio Amplifier 2x5W

The set up: 

  • Old Speakers taken from Out-of-Order HiFi, 
  • My lovely Old Robyn (Xperia X10mini), 
  • Old VHS power supply,
  • Spare cables taken from trash electronics (burnt ATX-PSU),
  • A little jack-jack 3.5 cable (1.50€)
  • Velleman MK190 kit (9.90€)


So i simply used the old power supply to get 12Volts : 


Plugged pin 5-6 (12.6V) and 7-10 (ground) to the power input of the module in a quick and un-recommended way : 


Now that it works, what's next?
The only work left is to make clean and safe connections to the power supply, and find a box that fits all. ==> Making safe connectors

Part 2: A better looking result

Part 3: Adding a better PSU